Design your dream garden today!
Get in touch with our expert garden designers for a quote.
Find out more

There are two major ways of propagating plants: propagation from cuttings and seed propagation. If you’re a gardener new to the game, you might find both processes intimidating. After all, they require time and effort. But, if you’re ready to begin your research in successful propagation to add the skill to your belt as a gardener, we’ve outlined the steps below.
Propagation from Cuttings
One of the popular and effective methods to multiply your favourite plants would be propagation from cuttings. Through it, you can clone an existing plant while making sure that it retains the same characteristics as the parent plant. Find out how to propagate successfully via cuttings in the following sections.
Step 1: Select Healthy Parent Plant
The first step in successful cutting propagation is finding a healthy parent plant. You need a robust parent plant to ensure that the new plant will inherit its strong and disease-free genetics.
For example, if you want to propagate the Teddy Bear Magnolia Tree, choose the one with vibrant foliage, sturdy stems, and a well-established root system. Avoid those with yellowing leaves, spots, or any signs that indicate underlying issues that will surely be passed on to the new plants.
Step 2: Prepare the Cutting
Now that you have a healthy parent plant, it’s time to prepare the cutting. Use a clean, sharp knife or scissors, to cut a section from the parent plant (around 10-15cm). The cutting should have at least one node since it’s the site from which the new roots will develop.
When you have the cutting, remove the lower leaves to prevent them from rotting when placed in the soil or water. On the other hand, leave a few leaves at the top to support photosynthesis.
Although optional, you can improve the success rate of your propagation by dipping the cut end into the rooting hormone. This promotes faster root growth, complementing various propagation methods.
Step 3: Plant the Cutting
Planing the cutting begins by selecting a well-draining medium. Depending on plant specifications, you can choose from perlite, vermiculite, or a mix of peat moss and sand, etc.
Put the medium into a small pot, creating an ideal environment for root development. Make a hole in the medium with either a pencil or your finger then gently insert the cutting into the hole. Remember that at least one node should be buried. Firm the medium around the cutting so it’s stable.
Step 4: Provide Proper Conditions
Place your newly planted cutting in a warm, bright location. However, avoid direct sunlight since it can scorch the tender cutting. It’s important to maintain high humidity; to do this, cover the cutting with a plastic bag or (if you have any available) place it in a propagation tray with a clear lid.
Additionally, the medium should be consistently moist but not waterlogged. After all, excessive moisture can cause root rot.
Step 5: Monitor and Transplant
Unlike seed propagation, cuttings require more monitoring to ensure that they’re properly taking root and thriving. So, every now and then, you can gently tug the cutting to check for root development and immediately address any issues.
Once the roots are established, transplant the cutting into a larger pot. Congratulations, your previously propagated plant is now ready to grow into a mature plant!
Propagation from Seeds
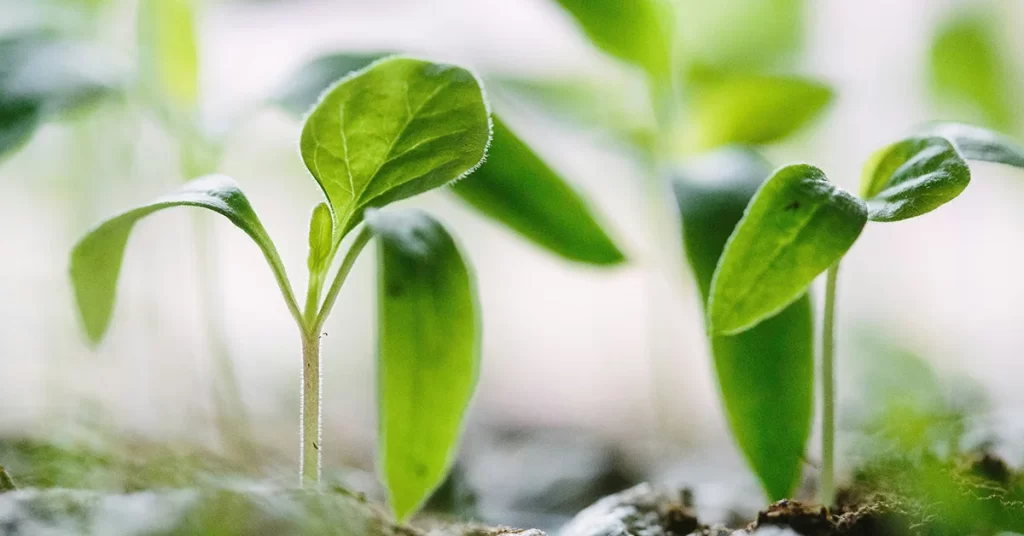
Seed propagation is known as both an effective and economical way to grow a wide variety of plants for your garden. It’s a fairly straightforward process. Simply collect or purchase high-quality seeds of your chosen plants, prepare a seedbed, sow the seeds, wait for the seedlings to develop, and transplant them when they are robust enough. We’ve outlined each of the steps for seed propagation below.
Step 1: Collect or Purchase Seeds
To start with seed propagation, get your seeds from reputable sources such as a trusted nursery or online retailers. Doing so will give you more confidence that the seeds are viable and true to the type of what you are looking for.
Or, you can also collect seeds from your own garden; just make sure that you collect from healthy, mature plants. Allow the seeds to fully ripen on the plant first to avoid collecting immature seeds that will often fail to germinate. When you have your seeds, clean and dry them thoroughly to prevent mould and decay, then, store them in a cool, dry place until you plant them.
Careful selection of seeds is the first step in successful seed propagation which will surely lead to a thriving garden. So, if you plan to propagate Heliconia Tropics with seeds, find the most reputable nursery as your source, promising only the best Heliconia species.
Step 2: Prepare the Seedbed
Your next step in seed propagation is preparing the seedbed. Begin by selecting the right seed-starting mix – a lighter, more sterile than regular potting soil. This mix offers good drainage and reduces the risk of disease, overall creating an ideal environment for seeds to germinate. Moisten the mix then evenly distribute it into your seed trays or pots. With a proper seedbed, you provide the best chance for your seeds to sprout and develop into strong seedlings.
Step 3: Sow the Seeds
With the seedbed prepared, it’s time to sow the seeds. Different seeds have different requirements. Some might require to be lightly pressed into the surface, while others should be covered with a thin layer of soil. Take note of these specifications before sowing the seeds.
Additionally, prevent overcrowding with proper spacing, giving each seedling enough room to grow.
Step 4: Provide the Right Environment
To germinate effectively, seeds need warmth and moisture. Ensure this by placing your seed trays in a consistently warm area. While many seeds require temperatures between 21-24°C to thrive, some might need additional warmth (depending on their requirements). You can solve this issue by getting a heat mat that provides consistent bottom heat.
When it comes to moisture, keep the soil moist but avoid waterlogging to prevent rot and fungal issues. You can retain moisture by covering the trays with a plastic dome or plastic wrap, creating a humid microenvironment. For proper ventilation, lift the cover occasionally to prevent mould growth.
Step 5: Ensure Adequate Light
For your seedlings to grow into strong, healthy plants they need plenty of light. Without adequate light, your seedlings become leggy and weak and will not survive once transplanted. Place your seed trays (or pots) in bright, south-facing windows so they can receive at least 6-7 hours of sunlight daily.
If you need more natural light, you can use grow lights. Check out LED or fluorescent grow lights; they provide a full spectrum of lights that plants need for photosynthesis. Place them just a few centimetres above the seedlings and adjust as they grow to maintain optimal distance.
Proper lighting is essential for seedlings to develop sturdy stems and healthy leaves. It will transform your seeds into robust plants, setting the foundation for thriving growth in your garden.
Step 6: Thin the Seedlings
When your seedlings have developed a few sets of true leaves, you’ll have to thin them out. This is to prevent overcrowding that results in weak and spindly plants. Thinning seedling is a straightforward process. Simply remove the weaker or excess ones, leaving only the strongest and healthiest selection with enough space and guaranteeing successful seed propagation.
Step 7: Transplant the Seedlings
When your seedlings have developed a few sets of true leaves, it’s a sign that they have grown large enough to be transplanted. Gently loosen the soil around the seedling, careful not to damage the delicate roots. Life the seedlings then transfer them to a pot full of nutrient-rich potting soil.
However, don’t be quick in transplanting your plants to the outdoors immediately. Acclimate them to outdoor conditions first for about a week. For instance, place them outside for a few hours each day, then gradually increase their exposure to sunlight, wind, and fluctuating temperatures. This process reduces the chances of transplant shock which will ultimately put all your seed propagation in vain.
So, be careful while transplanting the seedlings. It’s the last step of seed propagation, where you’ll see your seedling thrive into vibrant plants in your garden.
There are two ways you can propagate plants: propagation by cutting and seed propagation. Whether you choose one over the other, you need to conduct proper and comprehensive research on how to propagate your chosen plants effectively. Both processes require time and effort, but the end result of any successful propagation will give you the lush garden you have planned for your home.
Are you ready to propagate plants at home? Comment down below or reach us on our socials and start a conversation! Our experts will provide you with the right advice and guide you one step closer giving life to the garden you’ve always dreamed of.
For more gardening advice, check out Local Botanist blogs or visit our selection of plants and pots to add to your indoor or outdoor garden!